If you think best chicken tikka can only be relished in expensive fine dining restaurants, then this recipe will alter your opinion forever! Trust me on this, I have the best chicken tikka recipe for you which is even better than your favorite restaurant and you yourself can make it too!
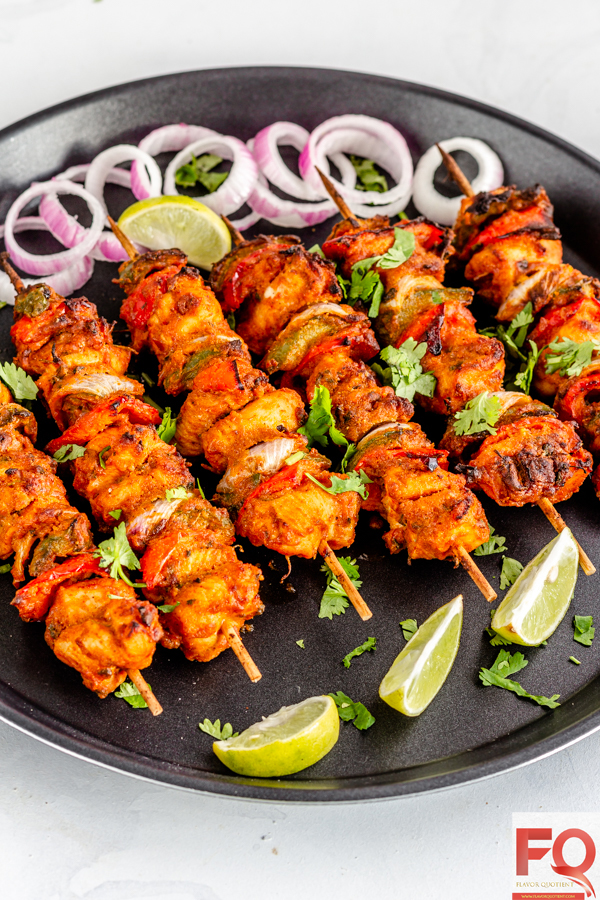 Smoky grilled chicken tikka is undisputedly the most loved Indian recipe around the globe thanks to its mind-blowing taste and suitability to most international flavor palate.
Indian cuisine is known to be spicy and from my first-hand experience I know that those who are not familiar with Indian food, get intimidated and shy away from trying it even for once! But that’s a miss for them and I would urge you not to do that to yourself!
Indian food is not only amazing, but is also extremely balanced and can be customized to any preference – spicy or non-spicy, sweet or salty or whatever your taste buds desire!
You may think I am saying this only because it is my own native cuisine which is why I’m adapted to it since childhood; but that’s not the case! I would put forward similar arguments for Thai cuisine too which is my soul sister in terms of food!
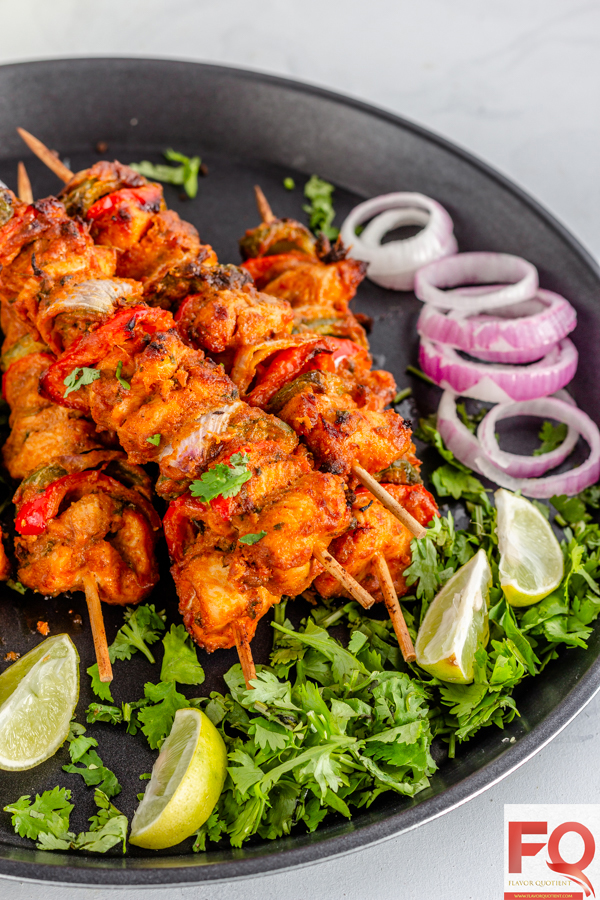 This chicken tikka is one such grilled chicken kabab which you cannot miss for life; I bet you will agree with me once you try making this at home using my fail-proof recipe below!
If I take the liberty of decoding this delicacy, then I would describe chicken tikka as amalgamation of all things good from Indian spice palate. Wondering how?
Well, chicken tikka is nothing but cubes of succulent boneless chicken smothered with a yogurt-based aromatic Indian spice mix and grilled to a charry perfection! Doesn’t that sound mouth-watering?
Best part of making chicken tikka is that you can make it even on weekdays as the cooking will be done in oven; all you need to do is to marinade the chicken a night before.
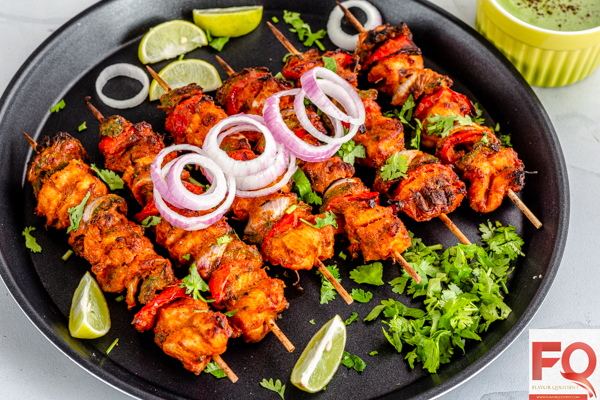 If you are already in love with Indian food as much as I do (may be because either you are an Indian or you showed the courage to take the first step of trying this spicy cuisine and fell in love with it), then I am sure you have relished your fair share of chicken tikkas in your favorite Indian restaurant.
Now it’s time to make your own! I will share useful & handy tips below on how not to make bland & tough chicken tikka; if you take note of these, your chicken tikka will be the best in town for sure and you will give the takeaways a miss every time you crave for this smoky delicacy!
Since the time I have started making kababs at home and practiced enough to make mine perfect, we have completely stopped ordering them at restaurants as many a times we had got nothing but disappointment! So let’s get into the best-ever-homemade-chicken-tikka-making! Shall we?
 Fundamental question for making chicken tikka – breast or thigh?
Well, unfortunately the answer to the above question is not too straightforward! I wish I could straightaway vote for chicken thighs but it will be very unfair if I completely discount on chicken breast as it is very much possible to make succulent & moist chicken tikka using breast meat if done right!
Let me share the handy guidelines which I follow to choose between chicken thighs and breasts while making these tikkas at home. If you are using your oven to make tikkas, then I would recommend using chicken thighs instead of breast.
Breast meat is literally fatless and can get overcooked too fast under the dry heat of conventional oven resulting into dry & hard tikkas; whereas chicken thigh will remain juicy & moist thanks to its high fat content.
If you are planning to grill your tikkas over stove-top using a grill pan, then chicken breast is your best bet as it cooks faster than thigh meat; your tikkas will cook evenly too without turning dry because grill pan heat is not dry heat. Just ensure to cut your chicken breasts into thin square strips for the flavors to penetrate as deeply as possible!
Is using hung curd/yogurt non-negotiable?
This time I have a straightforward answer for you all – Yes! You cannot replace hung curd with regular curd or even Greek yogurt as that still contains some amount of water which will dilute the marinate. Trust me, hung curd is not any rocket science; but just one extra step to ensure your tikkas are as flavorful as they could be!
All you need to do is transfer the yogurt/curd to a cheesecloth, tie it up, hang it around a kitchen tap or wherever appropriate and let the excess water drip off for at least 4 hours or more; so, by the end of it, you will be left with a very dense, somewhat sticky, super-creamy and soft ball of yogurt and that’s my dear, is your first sign of success!
Hung curd will ensure that spices remain stuck to the chicken pieces and maximum flavor is being absorbed. If you use regular yogurt/curd, the marinating mixture will not only dilute, but the marinate will even drip off while you thread the chicken & veggies into the skewers.
The more yogurt mixture sticks onto the chicken pieces, more smoky and flavorful your tikkas will be!
Can we make paneer tikkas or lamb tikkas using this recipe?
Absolutely, yes! Please be my guest! This recipe is very user friendly and you can use it to make restaurant style paneer tikkas, lamb tikkas or anything your desire. The yogurt based marinade is very customizable too as per your liking.
You can make it spicier by adding more chilli powder or you may choose to cut it down. You can even use this marinade for making succulent fish tikkas using boneless and skinless cubes of fish. Keep the fish pieces at least 2-inches long for best result.
Fish tikkas can be easily cooked on a lightly greased grill pan as they cook very fast and has high possibility to get overcooked in the superhot oven.
If you are a veggie lover, then use this recipe to make a super-healthy veggie skewers using assortment of veggies like baby potatoes, bell peppers, onions, tomatoes, mushrooms, sweet potatoes and more, options are practically endless!
So what are you waiting for? Use this rare home-bound time and put your culinary soul to work! Let’s make the bestest chicken tikka at home and as always, enjoy!
- Chicken thighs or breast – 500 gms, boneless & skinless
- Onion – 1, large
- Green bell pepper/capsicum – 1, medium
- Red bell pepper/capsicum – 1, medium
- Mustard oil – 1 tbsp
- Red chilli powder – 1 tbsp
- Coriander powder – 1 tbsp
- Cumin powder – 1 tbsp
- Dry mango powder/Amchur powder – 1 tsp
- Garam masala – ½ tsp
- Ginger-garlic paste – 2 tbsp
- Cashew paste – 2 tbsp
- Fresh cream – 2 tbsp
- Tomato paste/puree – 2 tbsp
- Sugar – 1 tsp
- Kasuri methi – 1 tsp
- Hung curd – ¼ cup, tightly packed
- Roasted gram flour / besan – 1 tbsp
- Butter – 25 gms/2 tbsp, melted
- Salt to taste (about 1 tsp for 500 gms chicken)
- Wash and pat dry the chicken well. Now cut the boneless chicken (breast or thighs) into thin small square shapes of about 1-inch length. Cutting into thin pieces is important for the marinate to penetrate and infuse the meat deeply.
- Cut the onion into big chunks – about 1-inch and then separate the layers to get onion petals. Cut each bell pepper/capsicum into 1-inch long pieces. Wash and let them dry in a colander.
- Now let’s prepare the chicken tikka marinade. In a large bowl, add mustard oil, red chilli powder, coriander powder, cumin powder, dry mango powder and garam masla. Mix all the spices thoroughly using a wire whisk or fork.
- Next add ginger-garlic paste, cashew paste, fresh cream, tomato puree, sugar, kasuri methi and salt to taste to the same bowl. Whisk thoroughly to make a uniform mixture.
- Finally add the hung curd and roasted gram flour. Using hung curd is super important for making perfect chicken tikka. Whisk the curd in to mix with all the spices and aromatics to make a perfectly homogenous tikka marinade.
- Now it’s time to add the chicken pieces and the veggies. Drop in all the chopped veggies & chicken and mix them with the yogurt marinade preferably using your hand as that would best coat the chicken & veggies. Feel free to use a spatula if you are not comfortable using your hand for mixing.
- Once all the chicken pieces and veggies are nicely coated, cover the bowl tightly with a cling wrap and leave it to marinate in refrigerator for 8 hours for best result. If you cannot wait that long, you can grill them after 2 hours.
- Before skewering your chicken into bamboo sticks, soak them in water for 30 minutes; soaking will ensure that the sticks do not burn in the oven while grilling. At this time, preheat your oven to 200 C / 400 F and place the wire rack at the topmost level of your oven.
- After your chicken has marinated for sufficient duration, it’s time to skewer them. Thread a set of bell pepper, onion petal & chicken alternatively into a skewer leaving 1-inch gap at both ends of the stick. You should be able to thread this amount of chicken & veggies into 6 to 7 10-inch long sticks.
- Take a baking sheet and place a grilling rack on top. Place the skewered chicken tikkas on top of the grilling rack in a single layer i.e. do not place one stick on top of another; if your rack is not big enough to hold all the sticks at one go, then grill them in batches for uniform grilling, else your chicken will remain raw inside and will burn at the outside.
- Now it’s time to grill. Place the baking sheet with chicken tikkas at the topmost level of your oven and switch to broil mode. This is how I get the maximum smokiness in homemade grills as the chicken get the direct heat and is in very close contact to the heat source.
- Grill them at 200 C for 15 minutes. Then take them out and brush with melted butter. Flip them over and brush the other side too with melted butter.
- Return the chicken tikkas to the oven under similar setting and grill them further for another 15 minutes or until you notice any pink in the chicken pieces. The chicken must get charred on the outside and should be completely cooked through and feels tender when poked with a spoon. If not done, grill for few more minutes keeping close eye on it as broiling can burn the food within seconds.
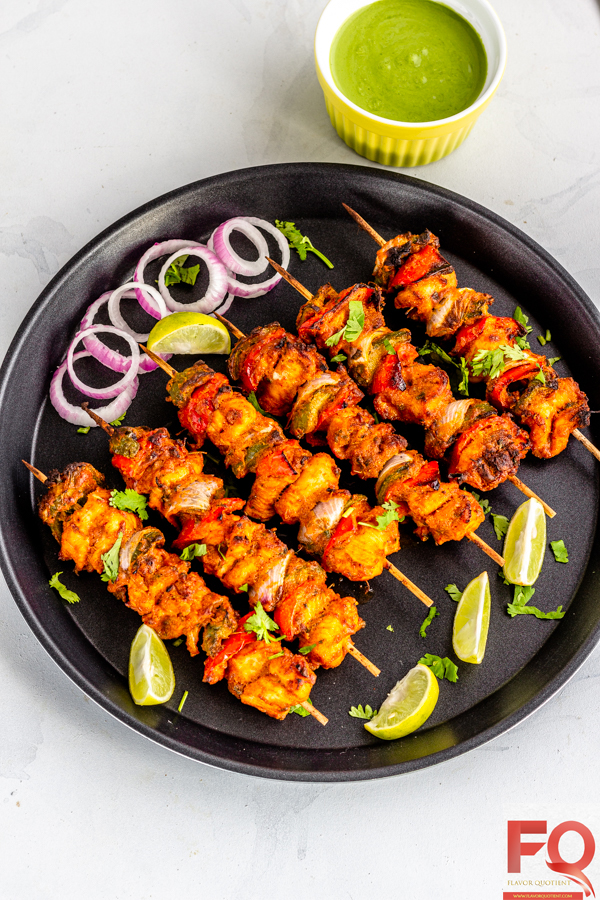
- Take them out and drizzle more melted butter on the hot grilled chicken tikkas! Serve them hot with green mint chutney and onion rings! Enjoy!

Thank You for such an amazing recipe.